Wednesday 26 November 2014

The perfect time to join my team

Hello! I have two great Stampin' Up! things to share with you tonight. The first I really should have shared a couple of days ago but better late then never! 

For one week only (until 2nd December) you can join Stampin' Up! as a new demonstrator and get 25% off the starter kit (usually £99) and 5% cash back on all commissionable orders placed in December. This means that you get to choose £130 worth or Stampin' Up! products for approx £75!! For more details on all the benefits of becoming a demonstrator click the image below!


The second one is that this weeks weekly deals are now live and they have some lovely items on special offer. I especially like the Celebration Basics kit which allows you to create your own party decor - perfect with the Christmas and New Years party season coming up! To take a look click the link below and then navigate to the store via the products tab along the top of the page. Alternatively get in contact with me via email and I can help you place an order.


Thanks for stopping in!


Saturday 22 November 2014

Make a batch of cards in minutes

Apologies for not being very active on my blog recently. We are currently trying to move house so we have boxes everywhere which means I have several cards made up ready to share with you but haven't had a chance to actually take photos and get them up on here. 

Today's card was so quick and simple to make and yet it has taken ages to show you! I really like this card as it was so quick to make but I can easily make variations depending on which background paper I chose to use. The patterned paper comes from the Trim the Tree paper stack and once I chose which one to use I then picked out one or two colours from the pattern to use on the rest of the card. In the example below I picked out Pear Pizzazz from the pattern for the card base and then chose Real Red for the mat and sentiment as I felt this went well with the greens. Here I chose to use the sentiment from the Wondrous Wreath set but you could use any Christmas sentiment if you didn't have that set.


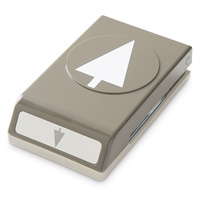
I then layered it up and used the tree punch on a piece of whisper white card stock so that you can see the patterned paper through the tree. You could make a whole batch of these in minutes!

While I am quiet on here I will always answer emails or questions so please don't feel you can't get in contact if you are interested in Stampin' Up! products or hosting a party.

Thanks for stopping in.

Supplies:

Tuesday 11 November 2014

Not just cards - Part 1

Evening everyone! I've taken a little break from card making to play with some of the other things I can do with Stampin' Up! supplies. I'm not sure how many parts there will be to this post but I've got at least three ready! 

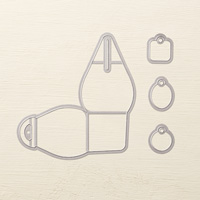
The first thing I wanted to share with you is the lovely curvy keepsake box die. I may have gotten a little carried away with this die as I absolutely love it. At a fayre a few weeks ago I wanted to try and sell some mini bath bombs as stocking fillers and I didn't want to just put them in any old box or bag so I got out my die and started to play.


As you can see I made quite a few different ones... and that's not all of them!! Below is a close up of three of the boxes made using different Stampin' Up! card, paper and ribbons. 


Working from left to right the first box was created by cutting the two halves of the box from Pool Party card stock and I then used the blue washi tape from the All is Calm pack to decorate two of the sides. Tip: Make sure you wrap the ends of the washi tape round the edge of the box otherwise it can start to come away. The middle and far right boxes were the easiest to create as each was simply cut from a piece of Under the Tree or All is Calm Designer series paper. Once all the pieces were cut I used Sticky Strip to stick the two sides together, placed the bath bombs and tissue inside and then popped them shut. They stay shut on their own but I wanted to finish them off with a little ribbon and a tag for people to write on. Here is a picture of the inside so you can see roughly how much space there is.


If you fancy making some of your own then below is the list of supplies, just click a picture and it will take you to my online shop. Alternatively if you'd like to buy these ready filled with bath bombs pop on over to my Facebook page to see all of the scents I have left.

Thanks for stopping by.

Supplies:


Saturday 8 November 2014

Bright and Beautiful Christmas

With the weather so wet and windy it's the best time to get a bit of crafting done especially with Christmas coming up! I love stars at any time of year but especially Christmas so when I saw Stampin' Up! had bought out the lovely Bright and Beautiful set I just had to buy it. 

As I do when I get any new stamp set I do a search on Pinterest for some inspiration and I found this wonderful simple card by Aly Schilling. Before I started putting the card together I went rummaging through my ribbon box to see what I could find, the satin stitched ribbon in this years In Colours was perfect! It has that lovely hint of shine and as you probably know I love the Blackberry Bliss and Lost Lagoon so I just had to make two versions of this card! Which one's your favourite?


The snowflake embellishments are so cute and look perfect with a rhinestone jewel glued to the middle to finish it off. What's Christmas without a little sparkle? Pop on over to my online shop to buy yourself some goodies so you have something fun to do next time it rains or pop on over to my Facebook page where you can order these cards ready made for you to give out :-)

Thanks for stopping by.

Supplies: