Thursday, 28 April 2016

I Heart You

Hello, well today I had my first KIT (keeping in touch) day at work preparing me for when I go back in June. I was really apprehensive about going in today for two reasons, the first that I would have to leave my boys. I know I have done it before when I went back to work after having little monkey but it just felt different leaving both of them for a whole day with someone other than hubby. Don't get me wrong I left them in the capable hands of my Dad for the morning and my Mother in law for the afternoon so I knew they would be fine. The boys probably didn't even notice I was gone but it just felt so strange. The second reason I was apprehensive was that I was convinced everything at work would have changed and that I wouldn't fit back in as it seems a very long time ago that I was there. Of course nothing really was different, everyone was the same and it actually felt good to be back. 

I'm now back home and the boys are still at their Nana's so to stop myself from missing them (I just want to give them a really big cuddle!) I thought I would dive into my craft room to make a quick card. I cannot tell you how quick this card was to make, I think what took the longest was deciding which side of the DSP to have for each bird. It was so quick I even had time to make an envelope for it!

Stampin' Up! Bird Builder Punch

I wanted to make an anniversary card for hubby as it's our anniversary next week but I didn't want it too girly and lots of red because that just isn't him. So as usual when I'm stuck for inspiration I went through my Pinterest boards to see what I could find. I found a lovely simple card by Kylie Henshaw which unfortunately I cannot link you to as the pin I have only takes me to the home page of her blog and I couldn't seem to find it when looking through her old posts. My card actually turned out quite different from the original when I compare the two. Sometimes that's just how it goes, you see something you like and it just starts from there.

My birds have been punched from the lovely Timeless Elegance DSP, I only punched the bird out of two pieces of the paper but it gave me several combinations for the bird bodies, wings and leaves. If you look carefully at the photo you will see all four sides of the paper have been used. I really love the bird builder punch and I'm going to miss it when it retires. It works so well on it's own or with some of the old coordinating stamp sets. Although I am sad to see this go I am really excited by one of the new punches and matching stamp sets that is coming in the new annual catalogue!

As always the supplies that I have used are below and if you click on the image it will take you straight through to my shop. I have already mentioned that the Bird Builder punch is retiring but the Timeless Elegance DSP, envelope paper, And Many More stamp set and the Itty Bitty Accents punch pack are all on the retirement list as well, so grab them while you can. 

Thank you for stopping by to read my blog.

Supplies:


Tuesday, 26 April 2016

How is he four?

Afternoon all, I have no idea how this happened but my little boy turned four a couple of weeks ago. I really cannot believe that he is four already, time goes so quickly when they are growing up and now we have little cub too it seems to be going even quicker! 

I usually make a card for little monkey's birthday but this is the first year he's actually asked for one and been very specific with his list of demands for his card. He said it had to have Spiderman, red, a big four and a Minion on. Not too much to ask for....I thought about printing a picture of Spiderman and then colouring it in but that seemed too easy, I wanted to make him. So I went onto Pinterest and searched for Spiderman punch art, I have a lot of punches so I was pretty sure I'd be able to make something! I found this card by Two Crafty Girls with a tutorial on how they made him. I didn't have all of the punches they used or the spider web embossing folder but I think he turned out pretty well. What do you think? 

Stampin' Up! Spiderman Punch Art

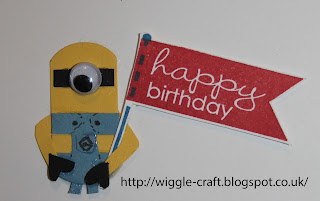
For my Spiderman I used a versamark pen and Stampin' Emboss black embossing powder to create the webbing effect. The background of the card was created with stamps from Gorgeous Grunge in Real Red and Pacific Point, I stamped each one off on some scrap paper first so that it wasn't too bright. I didn't want to take away from the main focal point. So we have Spiderman, there's red and there's a big four on the front, where's the Minion you ask? He's hiding on the inside of the card with a little birthday flag.

Stampin' Up! Minion

As I've posted this photo I've just realised he doesn't have a mouth! I'm not sure how I missed that but luckily little monkey didn't notice! When he opened his card he actually did a fist pump and said 'Yessssss' so I'm pretty sure he liked it. 

Just to let you know the oval punches that I used on this project and the black Stampin' Emboss powder are all on the retirement list so if you want them you had better get them quickly! Thanks for stopping by to read my blog.

Supplies:


Sunday, 24 April 2016

Sunday Retirement Showcase

Morning everyone, I hope you've all had a lovely weekend so far? We had a really fun day yesterday as there was a mini fair in the town to celebrate the Queen's birthday. Little monkey got his face painted with a Batman mask and then had a great time on the bouncy slide and hook the duck. After all the walking we did we were exhausted so going to take it easy today and have a lazy day!

As many of you will know Stampin' Up! have released the list of all of the products that will be retiring when the current catalogues end on 31st May. Anything on that list is only available until that date and while stocks last. It got me thinking about all of the stamp sets and tools that I own that are either retiring this year or have retired in the past. Ordinarily I do my best to keep them off my blog because I like to show you cards made with the latest Stampin' Up! stock. However someone said that we all need inspiration sometimes and so if you also own these old sets you don't want them gathering dust. I have a lot of retired items because I have been using Stampin' Up! products for about 3 1/2 years now and the reason I bought them is because I really liked them so I don't want to stop using them or sell them. For that reason I have decided that on a Sunday only I am going to showcase cards made with retired products. That way if you also own these sets you've got fresh inspiration and if you don't you will hopefully take something from the card that you can use with current sets.

To start off with I will be making cards using products that are on the current retiring list. As I said above that means that they are only available while stocks last until the 31st May. So items were even sold out before the list went live so if there's something you really want, act fast! If you want to see everything that is retiring but still in stock please click on the 'Going, going, gone' box on the left hand side.


Today's card is showing the Going Places DSP Stack and Going Global stamp set which are retiring from the Spring/Summer catalogue and and the Itty Bitty Banner Framelit Dies retiring from the Annual catalogue. I really like the Going Global product suite and I'm quite sad that it's going. I usually struggle making men's cards but since finding this set I have managed to make several cards from my husband and father in law. I love all of the different papers in the paper stack, there's quite a few to choose from. This is one set I wish was staying! I'm not sure if you can see very well from the photo but the star itself has been scored on each outer and inner point allowing me to make it stand up on the page rather than laying completely flat.


The sentiment is from Sunburst Sayings which I'm quite pleased is staying in the new catalogue as I haven't had a chance to use it much since I bought it. I hope you like what you've seen today, as usual I have listed all of the products I have used below and by clicking on the image it will take you through to my shop. Thanks for reading.

Supplies:


Thursday, 21 April 2016

Back to Basics

Morning all, well I'm pleased to say I've made it back for a second time this week! I actually woke up at half 4 this morning as little cub was crying out and once I'd settled him back down I thought I'd jump into my craft room as I know I'd only be grumpy if I tried to go back to sleep!

I found the challenge Back to Basics over at Daring Cardmakers earlier in the week and I kept trying to come up with ideas, I made one card that I might share at some point but I wasn't really happy with how it turned out, the colours didn't really work for the card. I think I was trying to over complicate things but couldn't think of anything else I could do until this morning. This card just popped into my head and wouldn't go away until I'd made it!


As the challenge was to go back to basics and only use the three primary colours I have only used four Stampin' ink pads and only ten products in total but I'm sure you could do this with a few less. In order to get the orange for the sand I mixed together daffodil delight and real red then used my aqua painters (any one else feel like a big kid when they get these out?) to do a wash over the bottom half of the card base. While still wet I added in some extra Daffodil Delight over the top to give it a nice golden effect. For my sun I initially used a stencil made with Whisper White card stock and the 1" circle punch to sponge on the orange I had mixed up. I then used the cut out circle as a mask so that I could do a wash of Marina Mist starting from my sand and working upwards so that it faded towards the top of the card. To then give my sun a hazy look I removed the mask and added a wash of Real Red over the top of the orange sun, 


I absolutely love how my Goose turned out, I have never used aqua painters to colour in a stamp before but because I had mixed my own colours and didn't want his legs to turn out green I thought I'd give it a go. I am very pleased with the watery effect especially on the grass, I feel that if it was a crisp image it just wouldn't have looked the same. The green for the grass was made from Night of Navy and Daffodil Delight. It was really nice to get back to basics and great a simple card with very few supplies. Thank you for stopping by to read my post, I hope you like what you've seen and that I've inspired you to give it a go yourself. Don't forget if you live near me and I run card classes from my home once a month.

Supplies:


Tuesday, 19 April 2016

I'm back (Hopefully to stay)

Hello! I cannot believe it has been over a year since my last post, so much for me posting once a week. I am sorry for not being on here in such a long time but normal life sort of caught up with me, shortly after starting my new job we found out I was pregnant, which after everything we had been through was a terrifying prospect. So with a new job, a new pregnancy and trying to spend as much time together as a family without thinking of all of the things that could go wrong again, I just didn't feel like crafting. Now however our wonderful little cub is coming up to six months old, it's such a relief that he is here and our family finally feels complete. I can also get back into my crafting now that I have moved all of my craft stuff into a new spot in the house and I've actually organised it! 

As this was my first card for a little while that wasn't for someone in particular I decided to look at some challenges for inspiration. I actually found two that I wanted to play along with.


For my card I flipped the sketch around and took the sentiment Shine from the GDP card. I'm not sure why but shine just made me think of butterflies and one of my favourite butterfly sets at the moment is Watercolour Wings. I love it, you can do so many different colour combinations with it and always come out with something different.


As my theme was to shine I added some silver embossing powder to the butterflies so that they caught the light. Here is a close up.


I really enjoyed making this card and hope you have enjoyed looking at it. If you would like to have a go yourself all of the supplies I have used are shown below and the images link straight through to my shop. Hopefully it won't be as long this time before I post again.

Thank you for reading.

Supplies: