Showing posts with label Aqua Painters. Show all posts

Sunday, 18 February 2018

CAS Colours and Sketches Challenge #259 - Sketch

Wow, Sunday evening already, I can't believe how quickly this weekend has gone and I had a three day weekend. It's been lovely, I was able to take my boys up to Wisley Gardens on Friday with my Dad to see the butterflies. The boys had a great time spotting all of the different coloured butterflies flying around above them. Then when it got a little too hot in the hot house we went outside to enjoy a lovely picnic, spring is definitely on it's way. Some of the spring flowers are starting to open and there were several birds hopping about looking for food.

To try and use up some of the boys energy we took a walk around the gorgeous grounds, including the vegetable patches where they were asking Grandad lots of questions about what all of the different vegetables were. I think their favourite part, other than the butterflies, was the play park. In one corner there was an area set up to build dens, they had great fun trying to stand huge tree limbs up to make the walls. It was lovely to see them working together, each at one end carrying it to where they wanted it.

Cat Herrington Wiggle Craft - Stampin' Up! Beautiful Day

Today's card was inspired by all of the beautiful butterflies we saw on Friday, there were so many different colours. There were also some that looked exactly like Autumn leaves, perfect camouflage.  I decided to play along with the CAS Colour & Sketches Challenge this week, I have flipped the sketch round to be portrait as I created the tag first and it then didn't fit on a landscape card, whoops!


To create my butterfly I stamped the outline in Fresh Fig and then used my aqua painters to colour in the rest of the image using Rich Razzleberry, Island Indigo and Marina Mist. I used very little water as if you apply too much onto Whisper White it can make the card stock bobble which ruins the effect. You can put as much water as you want on water colour card stock but you need to be careful when using normal Whisper White.

Cat Herrington Wiggle Craft - Stampin' Up! Beautiful Day

I punched the hole in the tag using the Watermelon punch from the Itty Bitty Fruit Punch set, I also used this to punch off the corners. For the striped element of the sketch I chose some of the striped paper from the Painted with Love speciality DSP. It's called speciality because it's a little bit special, on one side of each of the designs are some Gold elements. The Gold goes so nicely with the other colours on the DSP and I think fits in nicely on my card. To finish the card off I used my stamp-a-ma-jig to line up my sentiment, this is one of the first tools I bought when I discovered Stampin' Up! about 5 years ago and it's still one of my most used.

Cat Herrington Wiggle Craft - Stampin' Up! Beautiful Day

That's it from me today, all of the supplies I have used to create today's card are below. Please feel free to click directly on the image to link you to my online shop or drop me an email on csh.wiggle.craft@gmail.com with any questions or orders you may have. Happy crafting.

Supplies:


Tuesday, 3 May 2016

Floating Flower

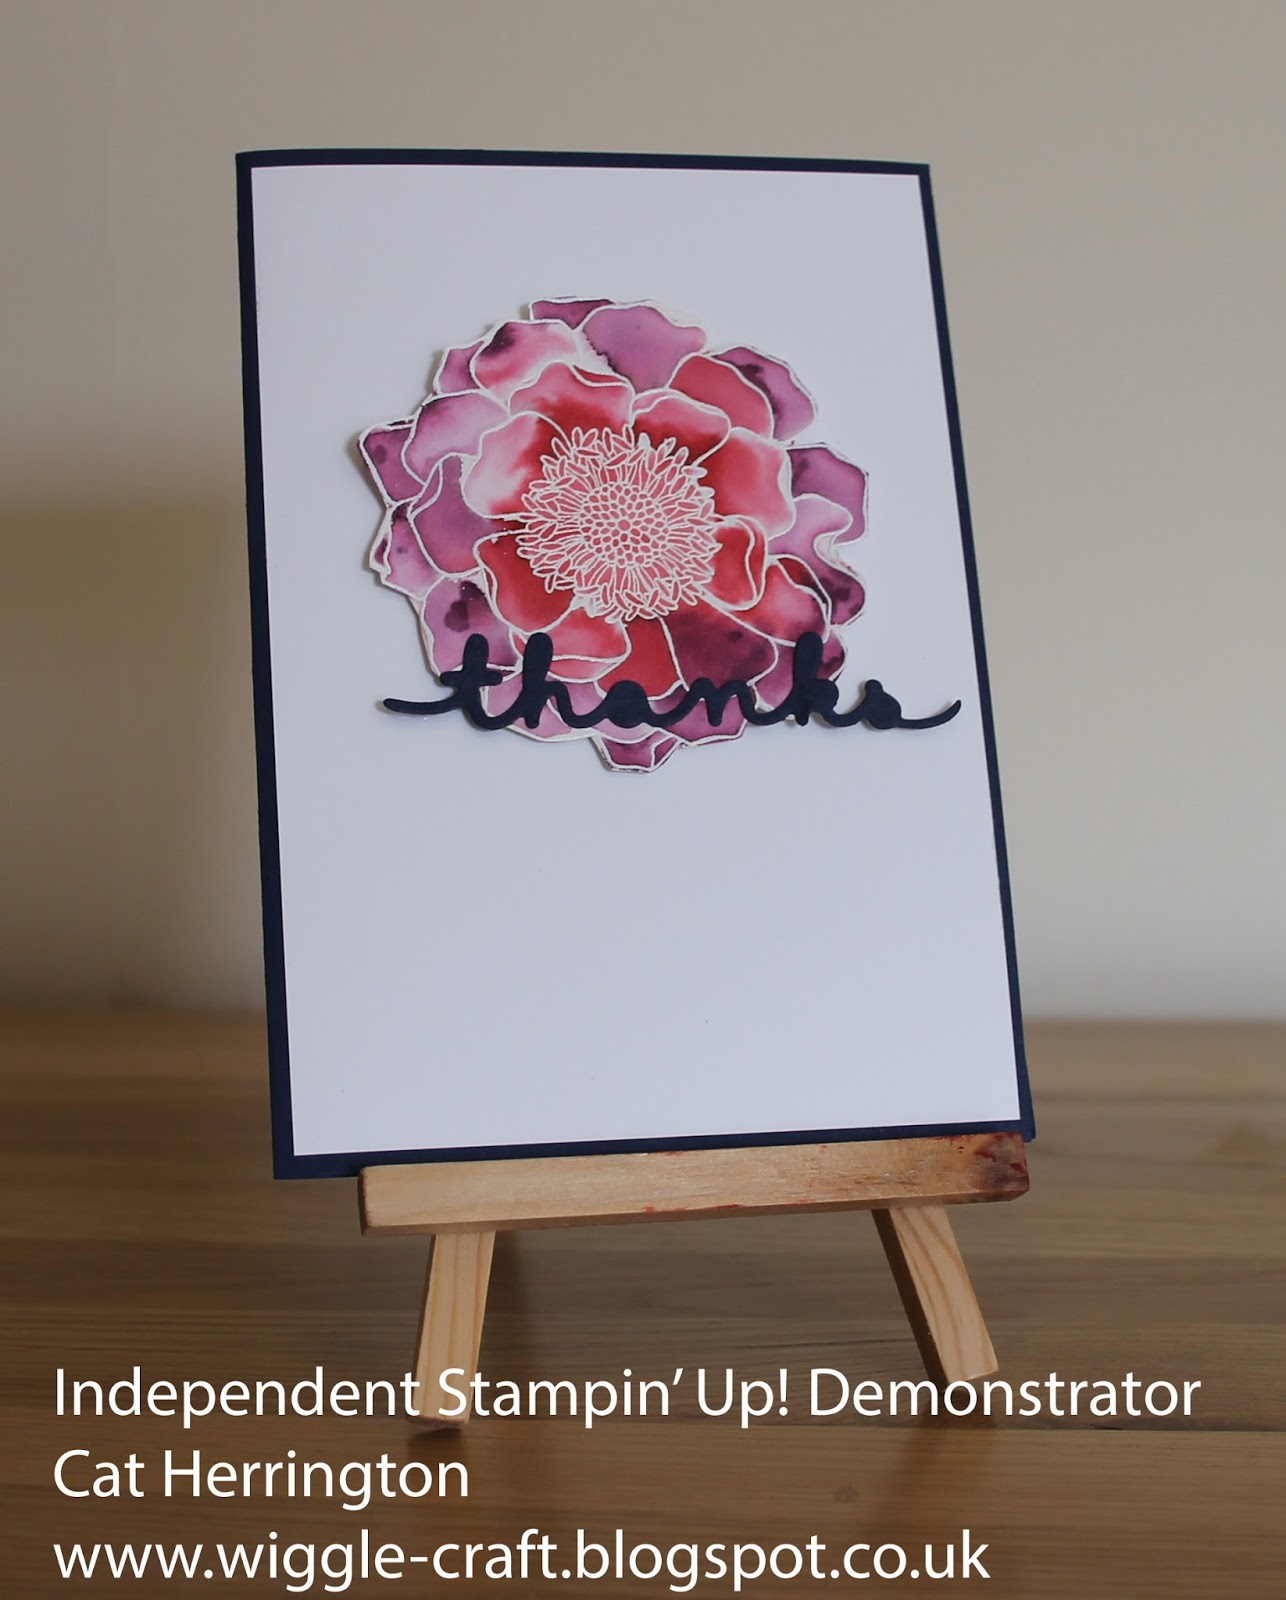
Morning all, I recently saw a card on Facebook by someone who said they had used the floating re inker technique to create it. I had never heard of this technique but liked their card so thought I would take a look on You Tube to see if I could find a video on how to do this. I'm so glad I did, I love the outcome! For those of you that have never heard of this technique before I took a couple of photos along the way and will try to explain how I did it. Here is today's card:

Stampin' Up! Blended Bloom

I would like to enter my card into two challenges today, firstly the Global Design Project sketch challenge and secondly the Cute Card Thursday 'No Patterned Papers' Challange. This is the sketch that inspired my card


So how did I make it? Well first I chose a stamp that had nice open areas that the colour could go into, I then stamped this onto shimmery white cardstock in versamark ink and heat embossed with white Stampin' Emboss powder. I used the shimmery white cardstock as this is thicker than normal Whisper White and great for water colouring techniques. Once I had heat embossed the image I used the lid of one of my button pots to put a drop of each colour re inker in. You only need a drop as it goes quite far and you can always add more later.


I then placed my card stock into an empty stamp case and spritzed the whole thing with plenty of water. Once the card was wet I took my aqua painter which is also filled with water and starting with the darkest of my colours dropped a small amount of ink into the sections of the flowers. Once I was happy with the dark areas I then continued with the other two colours.


If the cardstock starts to dry just spritz it some more with water. You really need small pools of water in each section for this to work properly. As I was cutting out my image once finished I wasn't worried if I went outside of the embossing. Once finished colouring all of the flower I used some tissue to soak up any areas that I felt had too much water in and then left it to dry.


I hope you agree that the finished flower is gorgeous!


 With this technique you are going to get a completely different outcome each time. I'm now looking for more stamp sets I can use with this! As usual the supplies I have used are shown below, both the Blended Bloom stamp and the Greetings thinlit dies are on the retirement list. Thank you for stopping by to read my blog.

Supplies:


Thursday, 21 April 2016

Back to Basics

Morning all, well I'm pleased to say I've made it back for a second time this week! I actually woke up at half 4 this morning as little cub was crying out and once I'd settled him back down I thought I'd jump into my craft room as I know I'd only be grumpy if I tried to go back to sleep!

I found the challenge Back to Basics over at Daring Cardmakers earlier in the week and I kept trying to come up with ideas, I made one card that I might share at some point but I wasn't really happy with how it turned out, the colours didn't really work for the card. I think I was trying to over complicate things but couldn't think of anything else I could do until this morning. This card just popped into my head and wouldn't go away until I'd made it!


As the challenge was to go back to basics and only use the three primary colours I have only used four Stampin' ink pads and only ten products in total but I'm sure you could do this with a few less. In order to get the orange for the sand I mixed together daffodil delight and real red then used my aqua painters (any one else feel like a big kid when they get these out?) to do a wash over the bottom half of the card base. While still wet I added in some extra Daffodil Delight over the top to give it a nice golden effect. For my sun I initially used a stencil made with Whisper White card stock and the 1" circle punch to sponge on the orange I had mixed up. I then used the cut out circle as a mask so that I could do a wash of Marina Mist starting from my sand and working upwards so that it faded towards the top of the card. To then give my sun a hazy look I removed the mask and added a wash of Real Red over the top of the orange sun, 


I absolutely love how my Goose turned out, I have never used aqua painters to colour in a stamp before but because I had mixed my own colours and didn't want his legs to turn out green I thought I'd give it a go. I am very pleased with the watery effect especially on the grass, I feel that if it was a crisp image it just wouldn't have looked the same. The green for the grass was made from Night of Navy and Daffodil Delight. It was really nice to get back to basics and great a simple card with very few supplies. Thank you for stopping by to read my post, I hope you like what you've seen and that I've inspired you to give it a go yourself. Don't forget if you live near me and I run card classes from my home once a month.

Supplies: