Showing posts with label Thinking of You. Show all posts

Sunday, 1 October 2017

Building Orchids for CAS Colours and Sketches

Good morning! Before I start I just want to warn you this is quite a picture heavy post as I am a little bit in love with today's card. As I don't often say that about my own cards I hope you'll excuse the amount of photos! If you follow me on Facebook or Instagram  you'll have seen my Dragonfly post yesterday saying that I often get inspired by nature. Well on my kitchen window sill I have several Orchids and my pink one is currently in flower. Every time I see it I keep thinking I should try and replicate it with my Orchid builder set, obviously nothing is as good as nature itself but I do like my version as well. 

Stampin' Up! Orchid Builder

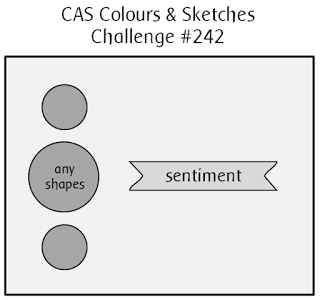
Today's card was also inspired by the sketch challenge over at CAS Colours & Sketches I'm not sure why when I saw it I thought of using Orchids but I did!


I had great fun creating this card with the orchid builder stamps and framelits. so I though I would include step by step photos of how I created them to show you how easy it is! First you stamp out all of your layers, I used plain whisper white this time with Berry Burst ink but it would also look good on the shimmery card stock.

Stampin' Up! Orchid Builder

Then use the matching dies to cut out all of your layers, I find the magnetic platform really helps, this way I know the borders round my layers are going to be as equal as possible and I won't accidentally cut part of my image off. It might just be me with messy die cuts without the magnetic platform though!

Stampin' Up! Orchid Builder

As I wanted a little extra colour on the petals I sponged the edges as well. Then with my pierce mat underneath to give it a soft surface I pushed the edge of my bone folder into each petal section to give it a bit of dimension. This step is not essential but it does make them stand out a bit more.

Stampin' Up! Orchid Builder

Then finally glue the layers together, I personally use glue dots between each layer as I can accurately put them where I need them and they're not messy! As a little extra touch I used my wink of Stella pen (seriously cannot get enough of this!!) on the centre of the flower.

Stampin' Up! Orchid Builder

For my card I made two of the small Orchids and one of the large ones, I then glued these on a stem cut using the seasonal layers dies. The sentiment came from the Orchid builder set as well and was stamped in Garden Green.

Stampin' Up! Orchid Builder

So what do you think? As I said I actually love this card, I think it also helped that I already had a recipient in mind when I started making this. Sometimes without realising it I'll put extra effort into a card if I already know who I'm giving it to. 

Stampin' Up! Orchid Builder

Thursday, 21 April 2016

Back to Basics

Morning all, well I'm pleased to say I've made it back for a second time this week! I actually woke up at half 4 this morning as little cub was crying out and once I'd settled him back down I thought I'd jump into my craft room as I know I'd only be grumpy if I tried to go back to sleep!

I found the challenge Back to Basics over at Daring Cardmakers earlier in the week and I kept trying to come up with ideas, I made one card that I might share at some point but I wasn't really happy with how it turned out, the colours didn't really work for the card. I think I was trying to over complicate things but couldn't think of anything else I could do until this morning. This card just popped into my head and wouldn't go away until I'd made it!


As the challenge was to go back to basics and only use the three primary colours I have only used four Stampin' ink pads and only ten products in total but I'm sure you could do this with a few less. In order to get the orange for the sand I mixed together daffodil delight and real red then used my aqua painters (any one else feel like a big kid when they get these out?) to do a wash over the bottom half of the card base. While still wet I added in some extra Daffodil Delight over the top to give it a nice golden effect. For my sun I initially used a stencil made with Whisper White card stock and the 1" circle punch to sponge on the orange I had mixed up. I then used the cut out circle as a mask so that I could do a wash of Marina Mist starting from my sand and working upwards so that it faded towards the top of the card. To then give my sun a hazy look I removed the mask and added a wash of Real Red over the top of the orange sun, 


I absolutely love how my Goose turned out, I have never used aqua painters to colour in a stamp before but because I had mixed my own colours and didn't want his legs to turn out green I thought I'd give it a go. I am very pleased with the watery effect especially on the grass, I feel that if it was a crisp image it just wouldn't have looked the same. The green for the grass was made from Night of Navy and Daffodil Delight. It was really nice to get back to basics and great a simple card with very few supplies. Thank you for stopping by to read my post, I hope you like what you've seen and that I've inspired you to give it a go yourself. Don't forget if you live near me and I run card classes from my home once a month.

Supplies: