Wednesday, 4 March 2015

Mothers Day - Part 3

Morning everyone! Don't worry I haven't forgotten it's Wednesday, the weekly deals will be in a separate post but I thought following on from yesterday's butterfly creation I would share the third Mother's Day card which just so happens to have another lovely butterfly on. I apologise for the quality of all of the Mother's Day card photos, these were made about a month ago when I hadn't had a chance to set up anywhere decent to take photos and well the result wasn't exactly my best. Hopefully the photo quality won't distract you from the card itself though.


Now I admit this butterfly isn't quite as pretty as yesterday's but I do still really like it. Although it looks black in the photograph it was actually cut from Blackberry Bliss card stock as this coordinated well with the Painted Blooms DSP.  


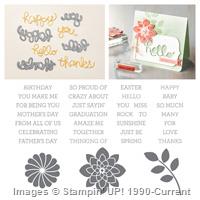
I'm not usually one for busy backgrounds but I felt this DSP worked really well behind the hexagons as it means it doesn't cover the whole of the background. The sentiment is from the Painted Petals stamp set and could easily be used for a card for a friend or for birthday's as well as Mother's Day.

Just a quick post today (ok not that quick but smaller than yesterdays!) Thank you for stopping in to read my blog. I'll be back later with some brand new weekly deals but if you can't wait until then just follow the shop link at the top of my page to take a look now.

Supplies:


Here are the links to all of the supplies I have used to create today's card, please feel free to click on them to go through to my shop.

Built for Free Using: My Stampin Blog

Tuesday, 3 March 2015

Natures Inspiration

Morning everyone, last week my Dad took little monkey and I to the butterfly house at Wisley. We had a great time spotting all of the butterflies in the hot house, there were so many different colours, shapes and sizes. It was amazing, here are my favourites of the day.


After seeing all of these lovely butterflies I wanted to try and re create their beauty, which at times is really difficult as nature has just made them perfect, but I think I may have succeeded slightly with this butterfly. 


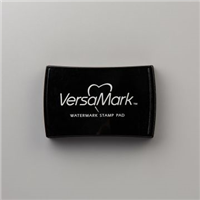
The blue of this is inspired by the blue and black butterfly in the top right of my photos above. To create the butterfly I first stamped the Swallowtail Butterfly in Versmark and then heat embossed using the Silver Stampin' Emboss powder. I then used sponge daubers to sponge Pacific Point and Rich Razzleberry on the wings and Chocolate Chip on the body. 


For the background of this card I have tried the Bokeh technique again, I tried this once before (check out my previous post here) but I didn't have all of the right materials. This time my White Craft Ink had arrived so I had everything I needed and I found a slightly different way to achieve the technique over on a fellow demonstrators blog Stampin Alley


You first brush watercolour paper with water (try not to get it too wet as you don't want pools of colour, they tend to dry with funny edges and can ruin your background) then using an Aqua Painter you paint on spotches of your chosen colours. The Aqua Painter keeps the paper wet so that the colours can mingle together. Once this is dry you then use a template cut with circle punches of various sizes to sponge on White Craft Ink. I cannot tell you how pleased I am with the result of this card! I love it so much that I plan to make a video on how to make this card so that hopefully someone will CASE it.

That's it for today, I hope you like my card as much as I did. Thank you for stopping by to read my blog, I'll be back again soon with another card to share.

Supplies:


Please see below links to all of the supplies that I have used in today's card.

Built for Free Using: My Stampin Blog

Monday, 2 March 2015

Mother's Day - Part 2

Morning everyone, I can't quite believe that it's Monday again already, Sunday went far too quickly! Although I shouldn't complain too much as I am meeting my lovely friend for lunch and a catch up today, definitely looking forward to it!

Today's card is the second of the four Mother's Day cards I have to show you. This one was CASEd from the Spring/Summer catalogue as I really liked the colour combinations. Another reason why I chose this one was that I hadn't tried inking an embossing folder before and wanted to give it a go!


The background piece was created by inking up a brayer and running it along the raised part of the Spring Flowers TIEF. Then when you run it through your BigShot the ink stays on the paper in the impressions created by the folder. The flowers were created using the lovely Painted Petals stamp set, the flowers and leaves are two separate stamps but fit together nicely. I personally recommend the photopolymer stamps for this set, where they are clear you can see easily where you need to stamp the petals or leaves once you have stamped the other. It makes it look like one stamp! However if photopolymer isn't for you, you could also use the Stamp-a-ma-jig to line them up nicely.

That's it for today, thank you for stopping by to read my blog, I will be back again tomorrow for the start of what could turn into a butterfly obsession! 

Supplies:


Here are links to all of the supplies I have used to create today's card, please feel free to click on any of the pictures to take you through to my online shop.
Built for Free Using: My Stampin Blog

Sunday, 1 March 2015

A little thank you

Afternoon everyone, as I expected I didn't get a chance to schedule a post for Saturday as I just really wasn't in the right frame of mind. Hubby and I took some much needed time together as a couple while little monkey had a sleep over at Nana's. I think we are both feeling more back to normal now that the date has passed and feeling very thankful for our friends and family. Which I think is probably why when I took some time out to create a couple of cards this morning I immediately reached for my thank you sentiments. 


Today's card was created using the latest sketch from the  Clean and Simple Colours and Sketches challenge blog. Here is the sketch...


....and here is the full view of my card.


I decided to use the birds from the Wetlands stamp set as the banner piece in the sketch and my sentiment for the circle. 


The panel of colour behind was created using the post it note technique, I'm not sure if there is a more technical term for this but that's what I was taught and I like it! An easy to remember name for such a simple little technique. You mask off the area using post it notes then using sponges just sponge any colours you like. Then when you peel away the post it notes you reveal a perfectly neat coloured in area. It's a good idea to using a bit of masking tape or snail on the back of your card to keep it in place on your work area 

That's it for today, thank you for stopping by to read my blog. I would love it if you could leave me a little comment to let me know you've stopped in.

Supplies:


Please find below links to all of the supplies I have used in today's card.

Built for Free Using: My Stampin Blog

Thursday, 26 February 2015

Mothers Day - Part 1

Afternoon everyone, I am popping in briefly to share with you the first of four Mother's Day cards that I produced recently when asked for some cards to sell. As before when I have done a series of cards they might not appear in consecutive order as I might find some challenges that I want to do, so you'll just have to keep popping back or follow me via email.


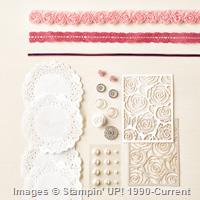
This first card was inspired by the hello sunshine card on page 31 of the Spring/Summer catalogue (Haven't got your copy yet? Drop me an email and I'll post one out to you) I changed the colours a little as I wanted to use the Rose Red lace from the Artisan Embellishment Kit. The flower has been done using the Crazy About You set. I stamped the flower four times, twice straight from the ink pad and twice having stamped onto scrap paper first. Then I used my matching punch to cut out the initial layer and my paper snips to cut out the subsequent layers. This was then finished off with a pearl from the Artisan Embellishment Kit. Did I mention how much I love this kit??


That's it for today. I would usually post again on a Saturday but this Saturday is a difficult day for us as a family as it is one year since we lost our baby Joshua. If I get the chance I will schedule a post for you but I hope you will all understand if I don't manage it. Thank you for stopping by to read my blog.

Supplies:


Please find below all of the supplies I have used to make the above card. The list is quite small this time round as all of the embellishments came as a kit and the stamps and thinlits came as a bundle! If you would like to order any of these products please click on the picture below or contact me using the details at the top of the page.

Wednesday, 25 February 2015

Happy Wednesday

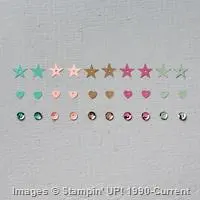
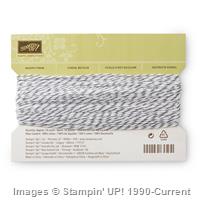
Morning all, it's a rather dull and cold Wednesday here today, hopefully where you are there is sun! Here are this weeks weekly deals to brighten up your day and this week they've gone made on embellishments and ribbons again. I'm already wondering whether I need to squeeze in a little order to get some more ribbons or maybe the In Color sequins, especially as they are for 2013-2015 only, hmmm decisions! 

That's it for today, as soon as I can work out how to save something as an image rather than a PDF I will have something else exciting to tell you about. Thank you for stopping by to read my blog.

Monday, 23 February 2015

Punch Art Lion

Morning all, I hope you all had a lovely weekend? We did, after our fun day out in Brighton on Saturday we then spent Sunday catching up with family and going for a lovely walk. I'll be glad when it warms up a bit though as it was rather cold and windy yesterday!

After showing you the video on how good Stampin' Up! punches are compared to some cheaper ones I thought I had better show you a card using some of them! While searching for ideas for children's birthday cards for tonight's party I came across this tutorial sheet by Debbie Naylor on how to make a Lion using Stampin' Up! punches and although I decided on a different route for tonight I really wanted to have a go at the Lion. After making the Lion itself I wasn't really sure what to do with him until I remembered the Freshly Made Sketch that had popped into my inbox. Here is the sketch that inspired me:


I thought the Lion would look quite cute on top of the slant so here is my card:


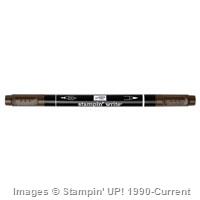
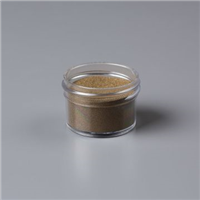
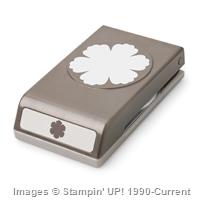
Where I used such a dark background colour I decided to use my Gold Stampin' Emboss Powder for the sentiment which I think makes it stand out perfectly and co-ordinates nicely with the strip of paper from the Gold Soiree DSP. The Lion's mane and feet have been made using the Blossom punch cut from Cajun Craze and So Saffron. To make the face I punched one 1 3/8" circle and two 3/4" circles from So Saffron then used the Owl Punch to cut the eyes and nose. To finish him off I used my Early Espresso Stampin' Write marker to create some whiskers. Excuse the smudging over his left eye, I got a little distracted by little monkey wanting to play with the Lion that I accidentally glued his eye higher up and had to try and rescue it!


That's it for today, thank you for taking to time to read my blog. I will definitely be back on Wednesday for weekly deals but if I get a chance I will be back tomorrow as there is another challenge I would like to play along with.

Supplies:


Please find below all of the supplies I have used in the above card, if you wish to order any of the supplies online simply click on the image and it will take you straight to my online shop. Otherwise feel free to contact me or leave me a comment. 
Price: £15.50
Price: £15.50
Built for Free Using:  My Stampin Blog